Sunday, January 12, 2014

Animation: Take One!

You might recall me mentioning in my last post that I have started animating the trailer for my book, Soulbound, and I hope (sincerely) that it's done by Feb 10th so that it's ready for the ARC blog tour. Of course, trying to animate a minute-forty-second trailer in less than a month....weeeeell, since I have no prior animation experience, I'm finding it to be a delightful challenge.

As promised, this blog is the first of many detailing my adventure in teaching myself animation and going through the trials and tribulations of creating a smoothly animated trailer. First lesson:

MUSIC

The first time I tried making an animation some three years ago, I got the key frames done and was making some massive progress, but I stopped when my computer crashed. A few months later, I began again, but there seemed to be less organization and less fire, and the project eventually vanished from the back burner altogether. What was missing? I asked myself as I began this newest trailer. What had I missed out on last time, and why couldn't I seem to get things right?

Then a friend of mine, Mallory Rock of Mallory Rock Art, suggested I check out this Website called Audiojungle. And as I skimmed their collections, pulling up a few random songs that piqued my interest, I began to connect a little more with the idea of choosing the music first. Then, I found the song. The moment it started, I could see what I wanted to animate, how I wanted to time it, and how the music would impact the story I wanted to tell through my trailer.

This is it, I realized. This is the song I've been waiting for, and this is what I need to start my journey and finish it. So, I bought the song. Now, some of you know that I am pretty damn poor. Broke, actually, but I decided that if I didn't have this song, the trailer would never come into being. Since I'm putting forth hours a day to make my dream a reality, I figured $19 was worth it--especially since I couldn't afford to hire anyone to animate for me!

"Well, yes," you might say, "of course music had to be involved. But c'mon. That's not what I'm reading this blog for. What else did you discover?"

SPLITTING YOUR TIMELINE

Once I had my music, I imported it into Windows Movie Maker (told you I'm poor) and snipped it down. The original track was 2:15, and that's way too long for a trailer. The song itself is amazing, so I had a hard time pulling out bits of the soundtrack to make it shorter, but I managed to make it smooth enough that no one should notice.

After clipping my music to 1:37 (far more reasonable), I began the task of breaking the track up into three blocks: Animation segments, black segments (for drama), and text segments. To do this, I created slides in CS4 (thank goodness I still have this program from high school days! It has saved my arse so many times!). One says, "ANIMATION" on a white background, another says, "TEXT," and the last one is just a black slide.

My next task was to listen to the music in bits over and over, dropping in my new slides until they were timed right. I hit dramatic pauses, strong notes, bursts, and all sorts of lovely segments until I had a great flow and could listen to the entire song without changing a thing. This took me quite some time to accomplish (about three and a half hours), so if this is your first time ever making a trailer, don't expect it to go super fast!

"That's pretty boring," you might say. "When does the action begin? I thought you were animating this thing!"

Well, I am. But we're not there yet. Almost--I promise, but there's one more thing yet to do before we start animating!

TEXT SLIDES

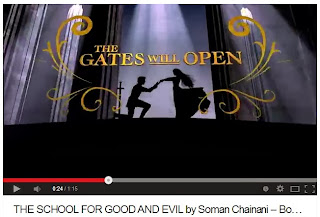
Ah, the text slides. The fade-in, fade-out glory of shadowed-and-highlighted movie text on a black background. Text is quite important, because it's what draws the viewer along. Sure, you can have fantastic animation and breathtaking music, but none of that matters if your viewers and potential readers can't tell who is who, what's at stake for each character, and why they should bother buying your book.

I spent a goodly amount of time working through what I wanted to say, where to say it (more adjusting timing, fades, and working with those slides I used earlier to chunk out what goes when), and tweaking the text itself over and over until it was smooth and made sense. My boyfriend helped me here a few times, which was great. NEVER underestimate the helpfulness of someone nearby, because if they haven't read your work, they'll let you know when something needs changing.

The text slides I have right now look pretty awesome, but they're not quite there yet. Why? Watch any professional book trailer (especially ones for A Monster Calls and The School for Good and Evil) and take note of what you see. The text has animation around it, right? At least it does in the really good ones. This is something that might seem insignificant, but actually has an enormous impact on your audience. You want to show them that the text is engaging, and it's up to YOU to make it so!

"Great, so that means you'll tell us about animation now, right?"

Yup!

ANIMATION

The next step is creating key animation slides. For those who don't know, key animation slides are the slides that show major motion changes in the animated segment. Before I even put pencil to paper to draw, though, I jotted down the time frames I had to work with (since I had already chunked out my timeline, this turned out the be fairly fast and easy). Next, I noted what text I had where, and tried to decide which scenes I wanted in which parts.

Keep in mind that one of the largest complaints about book trailers is that they don't follow the book's pacing; I tried to keep this in mind as I worked. Since Soulbound is Epic Fantasy, it has some slower parts, especially in the beginning. I tried to match that pace by having fewer animations up front. As the story ramps up, though, there's tons of action, and I followed that rise not only in my choice of music, but with the scenes I chose. I decided to follow the plot as closely as I could by drawing scenes directly from the book.

For the key animations, first I drew them on paper (really fast sketches to give me an idea of where to go and how to make everything flow), then I got onto my computer, grabbed my trusty mouse (even though I have a new tablet, I'm not well-versed in it enough to try a project of this magnitude using it...I've drawn on the computer with a mouse since I was 9, so it's natural for me; to be honest, the whole trailer is likely going to be done by mouse), and redrew my crappy hand sketches. I say "crappy" here, because this is NOT the final product.

"Why on Earth wouldn't you do a good job on the animation right from the start?" you might demand.

When I began putting the animation together, I could see how smoothly it flowed--and in come cases, how chunky it felt. Because of that, I ended up removing quite a few key frames from the scenes I'd finished. If I had taken the time to color and finish all of those frames, only to find out I'd trash ten and keep four, I would have been really, really mad. This is why I do quick sketches in key frames, so that when I time it out, I can see which frames I want to keep and which ones will never get used. This makes finalizing the product more streamlined and keeps me from wasting valuable time.

Well, now you're all caught up! I'm still in the midst of making key frames, and seeing as how I've spent about ten hours doing just that and only have about ten seconds animated, well... You can imagine how long this process takes. In fact, my next blog (which I PROMISE will have more pictures) will take you through the key frame animation process step-by-step. Until then, write on! Thanks for listening!

No comments:

Post a Comment